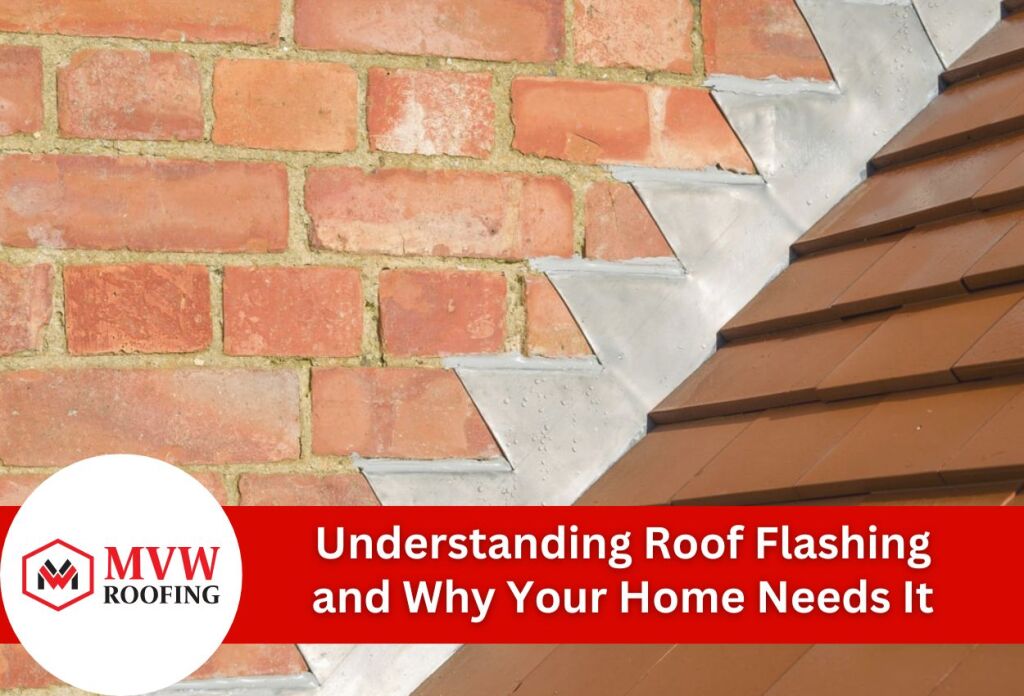
Roof flashing is one of the most important, but often overlooked, components of your home’s roofing system. This barrier prevents water from seeping into your house through joints, seams, and transitions where different roof surfaces meet. Without proper flashing, even the most well-constructed roof becomes vulnerable to water damage that can lead to expensive repairs and structural problems.
The basic function of roof flashing centers on water redirection. When rain hits your roof, water naturally flows downward following the path of least resistance. Areas where chimneys meet roofing materials, around skylights, near dormers, and along roof valleys create potential entry points for moisture. Flashing creates a waterproof seal at these vulnerable spots by channeling water away from these critical junctions.
Different types of roof flashing materials work together as an integrated system within your complete roofing structure. Metal flashing, rubber boots, and specialized sealants each play specific roles in maintaining a watertight barrier. Understanding what roof flashing is and recognizing its importance helps homeowners make informed decisions about roof maintenance and protect their property investment from water-related damage.
Common Areas Where Roof Flashing Protects Your Home
Several critical areas on your roof require specialized flashing installation to prevent leaks and maintain structural integrity. Chimneys are among the most vulnerable areas where roof flashing must create a watertight seal around the brick or stone structure. The junction between the chimney and roofing materials creates multiple angles where water can enter without proper step flashing and counter flashing.
Skylights present another high-risk area requiring comprehensive flashing coverage around the entire perimeter. These roof gaps need both head flashing at the top, side flashing along the edges, and sill flashing at the bottom to direct water around the opening. Plumbing vents, exhaust fans, and HVAC gaps also need specialized flashing or collar systems to seal around cylindrical openings.
Roof valleys, where two sloped surfaces meet, create natural water collection points that require valley flashing installation. These areas channel large volumes of runoff, making proper flashing materials essential for long-term protection. Wall-to-roof transitions, dormers, and bay window intersections represent additional vulnerable spots where different building materials meet.
Each of these roof gaps and transitions creates potential leak points without adequate flashing coverage and professional sealing. Signs of damaged roof flashing around these areas often include water stains, loose materials, or visible gaps that require immediate attention to prevent extensive water damage throughout your home’s structure.
Popular Roof Flashing Materials and Their Benefits
Aluminum flashing offers lightweight construction with excellent corrosion resistance, making it suitable for most residential applications. This material bends easily during roof flashing installation while maintaining structural integrity over decades of weather exposure.
Copper flashing provides premium protection with natural antimicrobial properties and develops an attractive patina over time. Professional roofers often recommend copper for high-end homes or historic renovations where longevity outweighs initial investment considerations. Galvanized steel flashing delivers robust strength for heavy-duty applications, though it requires proper coating to prevent rust formation in humid climates.
Synthetic and rubber materials offer flexibility advantages that accommodate building movement and thermal expansion. EPDM rubber boots seal effectively around plumbing vents and irregular gaps where rigid materials struggle to conform. Modified bitumen flashing strips provide self-adhesive installation options that simplify roof flashing maintenance projects.
Membrane flashing systems combine multiple roof flashing materials into integrated waterproofing solutions. These synthetic options resist UV damage while maintaining elasticity in temperature extremes. Professional installation ensures proper material selection based on specific roof conditions, climate factors, and building requirements. Understanding different types of roof flashing materials helps property owners make informed decisions when addressing signs of damaged roof flashing or planning preventive maintenance programs.
Different Types of Roof Flashing Systems Explained
Step flashing and continuous flashing represent two fundamental installation methods that create reliable water barriers along roof edges and wall intersections. Step flashing uses individual L-shaped pieces installed in a staggered pattern where each piece overlaps the next, creating multiple layers of protection. This method works particularly well along sloped surfaces where the roof meets vertical walls or chimney structures.
Continuous flashing runs in long, unbroken sections along horizontal transitions such as shed roof connections or long wall-to-roof junctions. This approach provides seamless protection across extended areas but requires careful installation to prevent water from backing up behind the flashing material. Both methods rely on proper overlap techniques and secure fastening to maintain their effectiveness over time.
Specialized flashing types address specific roof features and gaps that standard methods cannot adequately protect. Valley flashing creates waterproof channels where two roof slopes intersect, directing heavy water flow safely down and away from the structure. These installations often use wider flashing materials to handle increased water volume during storms.
Drip edge flashing is another specialized type that protects the roof perimeter by extending slightly beyond the roofline, preventing water from running back under roofing materials.
Professional Installation Process and Key Considerations
Professional roof flashing installation follows precise measurement and preparation steps that ensure long-lasting water protection. Roofing contractors begin by carefully assessing each gap or transition area to determine exact dimensions and material requirements. Accurate measurements prevent gaps or overlaps that could compromise the waterproof barrier, while proper surface preparation removes debris and creates clean bonding surfaces for adhesives and sealants.
Cutting techniques require specialized tools and expertise to create precise shapes that conform perfectly to roof angles and gaps. Professional installers use metal brakes, snips, and forming tools to shape flashing materials without creating stress points or weak spots. Proper cutting prevents torn edges that could allow leaks to form while maintaining the structural integrity of the flashing system throughout its service life.
Secure attachment methods involve strategic fastener placement and appropriate sealant application to create permanent bonds with existing roof materials. Contractors coordinate flashing installation with shingle placement, ensuring proper overlap sequences that direct water flow away from vulnerable areas. This timing prevents installation errors that could trap moisture or create reverse-flow conditions.
Roof slope significantly affects water flow velocity and flashing design requirements, with steeper pitches requiring different overlap specifications than low-slope applications. Weather conditions during installation impact sealant curing times and material handling, making timing crucial for the best results. Professional installers understand these variables and adjust their roof flashing installation techniques accordingly to ensure reliable performance regardless of environmental challenges.
The Signs Your Roof Flashing Needs Attention
A visual inspection reveals several clear indicators that roof flashing materials are failing or have sustained damage from weather exposure. Rust formation on metal flashing components signals deterioration that compromises the waterproof barrier, particularly around fasteners and seam connections where moisture accumulates.
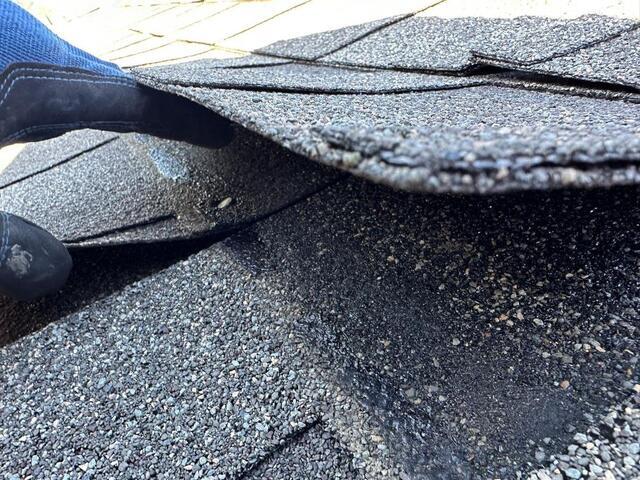
Visible cracks in flashing materials create direct pathways for leaks to form, especially along fold lines and areas subject to thermal expansion. Loose sections that pull away from roof surfaces or wall connections indicate fastener failure or inadequate installation techniques. Missing pieces of flashing leave vulnerable areas completely unprotected, allowing water to get directly into underlying roof structures.
Interior signs of flashing failure provide unmistakable evidence of leaks that require immediate professional attention. Water stains on ceilings or walls near chimney areas, skylights, or roof transitions indicate active leaks through compromised flashing systems. These discolored spots often appear as brown or yellow marks that expand over time as water damage progresses.
Mold growth around roof gaps signals persistent moisture problems caused by failing flashing materials. Peeling paint, warped drywall, or damaged ceiling materials near vulnerable roof areas indicate ongoing leaks. These interior warning signs typically appear after exterior flashing damage has existed for some time, making prompt roof flashing maintenance essential when any exterior deterioration becomes visible.
Maintenance Tips to Extend Flashing Lifespans
Regular maintenance practices significantly extend the service life of roof flashing materials while preventing expensive water damage repairs. Property owners should establish a consistent inspection schedule that includes both seasonal checkups and post-storm evaluations. Spring and fall inspections allow homeowners to identify winter damage and prepare flashing systems for winter.
Cleaning procedures focus on removing debris accumulation that can trap moisture against flashing materials and accelerate deterioration. Leaves, twigs, and granular material from aging shingles often collect around flashing transitions, creating dam-like conditions that force water behind protective barriers. Gentle cleaning with soft brushes removes this buildup without damaging delicate sealant connections or scratching metal surfaces.
Homeowners can safely perform basic maintenance tasks, including visual inspections from ground level using binoculars, clearing accessible gutters that affect water flow patterns, and removing obvious debris from lower roof areas. Simple observations can identify loose flashing pieces, missing sealant, or obvious damage that requires professional intervention before minor problems become major leak sources.
Professional roofers should handle all repair work involving actual flashing replacement, sealant reapplication, or installations requiring roof access and specialized tools. Signs of damaged roof flashing, such as rust formation, cracked materials, or interior water stains, indicate the need for expert evaluation. Roofing contractors possess the experience and equipment necessary to safely diagnose flashing problems and implement appropriate solutions that restore complete water protection to vulnerable roof areas.
Protect Your Home with Professional Roof Flashing Installation from MVW Roofing
Roof flashing is an essential component of your roofing system, designed to protect your home from water damage. At MVW Roofing, we understand the importance of properly installed roof flashing and offer specialized services to ensure that your home stays dry and damage-free. Whether it’s around chimneys, skylights, or in the valleys of your roof, our expert team uses the best materials and techniques to secure your home against the elements.
If you’ve noticed any signs of damaged flashing or are unsure about the condition of your roof’s flashing, don’t wait for the problem to worsen. Leaks and water damage can lead to more significant issues, including structural damage and mold growth. Call MVW Roofing today at (229) 821-3150 to schedule a thorough inspection and get professional advice on maintaining and protecting your roof for years to come.